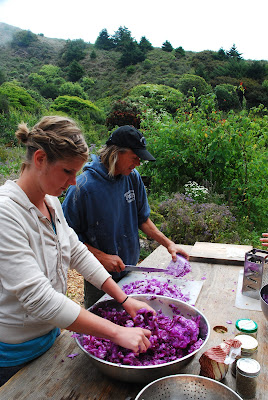
so its been a while. been busy on the farm- visitors, events of 70+ people coming on for the past weekend... weeding... lots of watering, and the orchards are about ready to explode! we are also busy making stuff and things with cabbages!
Melanie, who is a dear, amazing, wonderful friend of mine from Iowa, came and stayed on the farm for a month. Todd, our fisherman farmer in residence in bolinas came with a bunch of cabbages from his garden- what do you get??
sauerkraut! this process is super awesome easy! chop the cabbages into quarters taking the tough stem core out of the middle. then finely (or coarse its up to you) chop the cabbage into ribbons, shreds, or what have you, and salt! dont be afraid of the salt, you want to massage the cabbages with the salt in a bowl till they create a good liquid and become some what translucent (or at least softened and slightly "gushey")- if the cabbage still has a little bit of that crunch, keep massaging. if it doesnt get to the translucent soft liquid, add a little more salt till you do. then add what ever you want to the mix! ginger, peppers, shredded carrots, sea weed, onions, garlic, what ever is laying around and you think would taste good in your Kraut/kimchi!
a side note- red cabbage is good, and some of it we actually made like a kimchi- spicy and pretty salty. if you want good and proper Kraut, use the white/yellow cabbages- they have a better sugar content that the lactic acid loving bacteria tend to favor that exist naturally on the leaves of the cabbage. this is what really ferments and gives you that "sauer" taste of sauerkraut. Lactic acid loving bacteria are the core of the fermentation process for kraut, and many people use Whey left over from making cheese to start batches of all kinds of fermented products that favor these bacteria. White Cabbage has it naturally in its skins and leaves, so you get that wonderful, sour, and sweet taste when you massage it into that liquid and bottle it up! the whole process eventually goes through multiple stages of wonderful little bacteria that set the stage for making an acidic final solution that prevents any of the nasty nastys that can cause botulism.

after all is said and done with the mix, put into a jar or container, and make sure all the kraut is below the surface of the liquid- we take a smaller jar and stuff it into the container so it keeps the goodies sunk below the surface. if you dont, the kraut will get moldy. if a natural scum or mold does form on the surface ITS OK! it happens. and it wont go any further then that. just scrape it off and onward you go!
then let sit for 10 days or so. if you decided to use mason jars and put lids on them REMEMBER TO RELEASE THE PRESSURE!!!! we will tape the smaller jars into the larger jars to hold the solids below the liquids so it does not spoil, but it has room to breath around the taped up jar. you will EXPLODE your jars if you dont release the pressure when you put caps on!
when you open one up after 10 to 14 days at room temp, and try it, its ready when you want it to be. it really shouldnt sit any longer then that. transfer out the kraut/kimchi into a better jar- this is when you can cap it- SO LONG AS YOU REFRIGERATE IT. if you keep it in a new container at room temp, closed up, it will continue its fermentation, and you run the risk of exploded jars. the process stops at or around fridge temp.
there are hundreds of recipes out there, and traditional kraut and kimchi is done in ceramic fermentation vessels that have small non-reactive stones or ceramic disks to put inside to hold down the goods away from the surface of the salty brine. some of these recipes can call for 10 days to almost 6 months or even a year. what ever you find to build off of, know there is endless process to how this can be done!
Happy Krauting!


